

Ladder inspection checklist for the home user
Estimated reading time: 0 minutes
Ladder inspection, as dull as it sounds is really important for ladder users both at home ans at work. Ladders are a wonderful piece of equipment, that at first glance seem to be extremely easy to use. While this might be true of the majority of types of ladder (multi-function ladders are definitely an exception to the rule!), but there are some things you need to be aware of before starting to use your ladders. Don’t forget to download our ladder inspection checklist for free, using the links below!
Before setting up your ladders & starting the job, it’s really important that you give the ladders a quick check over. This is a really simple task, and it will take you about 30 seconds to complete for a small set of domestic steps, and around a minute for larger extension ladders.
The last thing you want to do is to start climbing a set of ladders or steps and find that they are wobbly or broken. So, make sure that they are safe to use before you start the task
Things to think about include;
- When did you last use the ladders?
- Has anyone else used the ladders after you & did they look after them?
- What condition are the ladders in? Do they look like new, or are they contaminated in paint splatters, plaster filler, oil or grease?
- Have the ladders been dropped or had things stored on top of them?
Table of contents
What do you need to check & how do you do it?
Essentially you need to check every single part of the ladder. You’re looking for damage, corrosion, missing or non-standard replacement parts, missing safety labels & anything that could be hiding damage to the structure of the ladders.
Let’s have a look at what makes up a stepladder and an extension ladder.
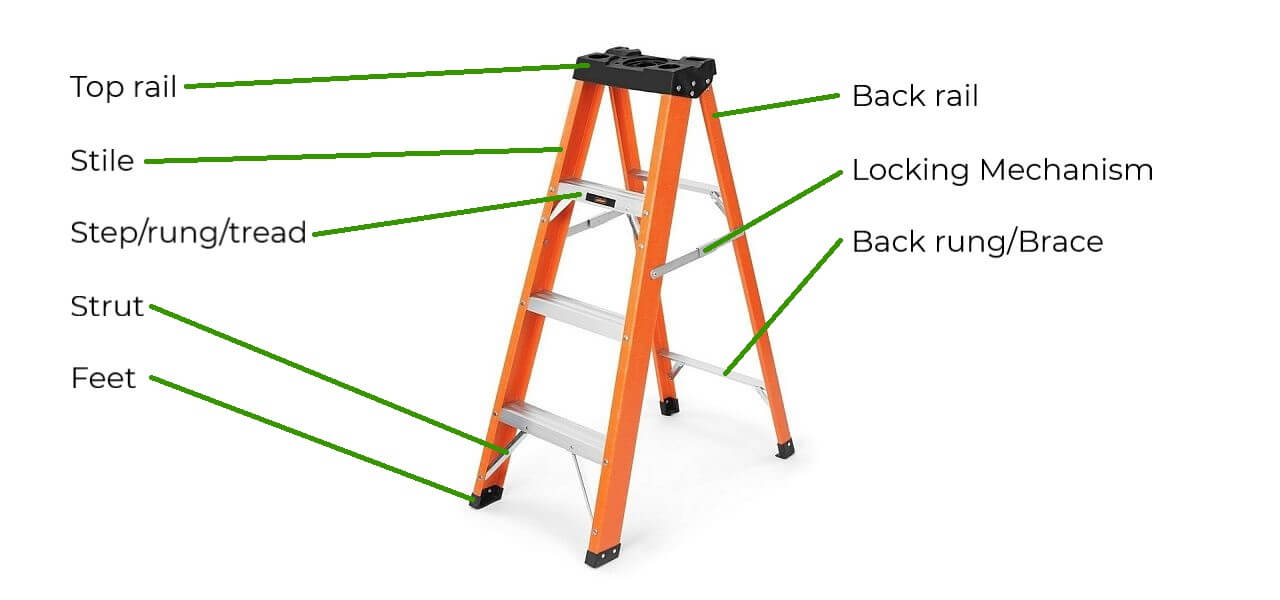


Stiles
The first thing we’re going to check is the stiles – these are the main long side rails of the ladder & they have to be subject to the same stringent inspections as any other element of your ladder.
Check to see if they don’t have any cracks or splits. Over time, ladders can sometimes become twisted or distorted, especially if they’ve been dropped. Check that this isn’t the case by sighting straight up them. If you spot even a slight deviation from a completely straight line, don’t use them.
It’s common, through use and storage, for ladders get dents in them. These can fatally weaken the structure of the ladder, allowing it to buckle or collapse while you’re working from it.
As a rule of thumb for a metal ladder, any dents that are bigger than, or deeper than a 20 pence piece, mean that the ladders should not be used. This is because they may be structurally weakened.
If you find that the metal ladders you’re about to use have a dent in them bigger than a 20p piece, are warped, bent, etc, don’t use them. Repairs may be possible but quite often the cost of repair will be more than the cost of a new set of ladders. Where you’ve got a multi-section extension ladder, each of these sections needs to be inspected and recorded in a ladder inspection checklist sheet.
Fibreglass ladders
If you’re checking a set of fibreglass ladders, these need to be dent free and without any splits or fractures in the fibreglass. If you find any of these, don’t use the ladder as they will be fatally weakened and should be disposed of or professionally repaired. Remember: only manufacturers authorised agents should undertake repairs of ladders.
Back rails, braces or handrails on step ladders
Back rails are the vertical parts that form the rear legs of a swingback ladder. These need to be given the same checks & meet the same standards as the main stiles.
The horizontal parts that connect the back rails together are known as braces. Unless you have “double sided ladders”, these braces should never be used as something to stand on. If they’ve been bent or damaged in any way, the ladder shouldn’t be used.

Check to see if these back rails are bent, loose or otherwise damaged. If your ladder has a set of handrails attached (normally these are only found on platform ladders) these also need to be firmly attached. You don’t want to consider the consequences of the handrail coming off while you are holding it and climbing the ladder.
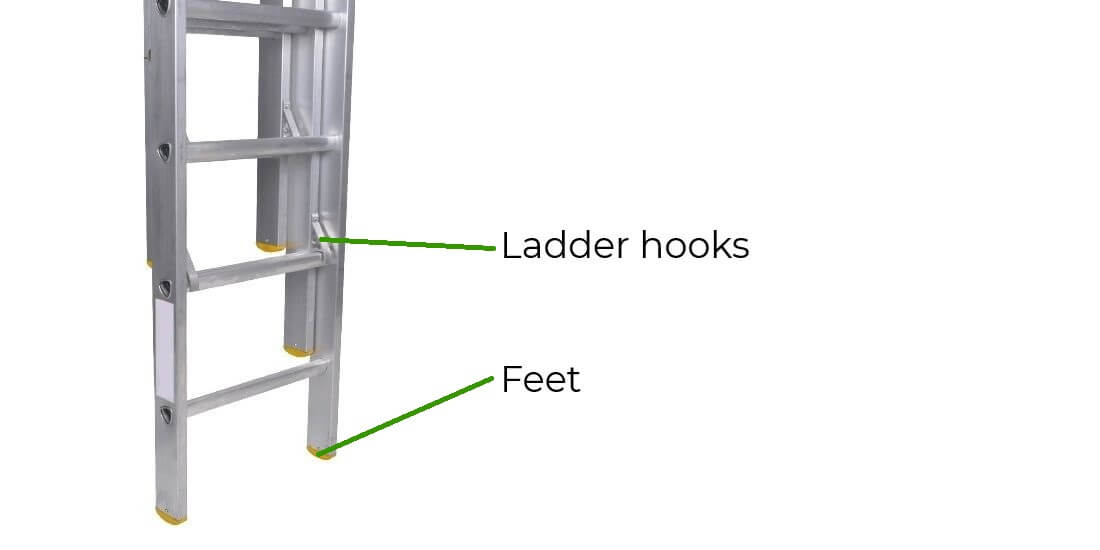
Feet & End caps
You need to check that the ladders feet are there, firmly attached and not worn or damaged. Think of these as being similar to the tyres on your car. You wouldn’t drive down the road with a missing tyre, or one that was broken or had no grip left on it. Missing, worn or damaged ladder feet could mean that the ladder may slip, buckle or not stand straight; a safety critical element to be recorded as part of your ladder inspection checklist.
If your ladder has been used outside, the feet might be contaminated with soil. As well as making the floor dirty, the ladder is more likely to slip as it’ll be the soil making contact with the floor & not the feet of the ladder themselves.
End caps are the same as feet, but at the top end of the ladder. These need to be in place to protect the surface that your ladder is leaning against & to provide sufficient friction to help prevent sideways slipping while you’re on the ladder. Check to make sure that they’re present, firmly attached & have sufficient grip to prevent the ladder sliding on the surface.
Rungs
The rungs, steps or treads of your ladder are one of the most frequent causes of slips and falls. This isn’t surprising as they’re subject to loads of wear and tear as you hold onto & stand on while climbing the ladder.
Check to make sure that they aren’t split, cracked, bent or buckled or missing. Check that they’re firmly attached to the styles/back rails & can’t be moved, twisted or rotated by hand. Also ensure that they’re free of contaminants that could make them slippery, such as soil, snow, paint, plaster, oil & grease. When you’re undertaking a formal inspection of your ladders, any failings in these have to be noted in your ladder inspection checklist.
It is possible to get these repaired, but repairs can only be undertaken by agents authorised by the manufacturers of the ladder. Typically, repairs to ladder rungs will cost more than a replacement set of ladders. If you find that the rungs are bent, worn, missing or loose please don’t use the ladders; it’s not worth it.
Struts
The struts are the angled pieces of metal that cross between the horizontal & vertical parts of your ladder (i.e. the rungs & stiles). You will also find them on the back rails of step ladders or rear legs of double-sided ladders. These structural braces are there to provide longitudinal resistance & prevent your ladder from collapsing sideways.
Check these to make sure that they’re all present, firmly attached and that the connections are original, tight and secure.
Missing, bent and home-made repairs to these safety critical structural elements are all too common. If you find that your ladders have missing struts, or that the original connections have been lost or replaced by a well-meaning owner, don’t be tempted to use them.
Locking Mechanism & Webbing
If your ladders have a locking mechanism, this also needs to be checked. Check to see if the metal work is bent or otherwise damaged. The fixings should not be worn or missing either. Check to ensure that any locking bars or pins fully engage & that they’re not too stiff or too loose. Any webbing straps are there to prevent the ladder from opening too far. These should be in good condition and not frayed, torn or missing.
Platform
Convention has it that ladders with a platform for you to stand on are known as “platform ladders” when they have more than 4 steps, excluding the platform. If you’re using a platform ladder (a ladder with a platform for you to stand on), check to see if the metalwork is split, dented, buckled or otherwise damaged. These form an integral part of the ladders structure and if they are damaged can result in the ladders becoming unstable or collapsing while you were on them.

Everything else
Having checked specific parts of your ladders you now need to check all the fixing’s for rust, corrosion, and to make sure that they are present and firmly attached. Essentially, you’re looking for any change from the way it came from the factory. Small amounts of surface rust on rivets is acceptable, but significant amounts shouldn’t be accepted & the rivet must be assumed to be structurally weakened rendering the ladder beyond use. Changes mean that the ladder can’t be relied upon to do what it says it can on the safety label.
Labels
Checking the ladders labels is a critical part of completing a ladder inspection checklist. Don’t forget to check the label to see exactly what the ladder can and cannot be used for. Over the years there have been many different official standards for ladders reach to become certified. Many cheap imported ladders don’t meet any standards. Sadly, the standards are only a guide and not a legal requirement, so retailers are allowed to sell these low-quality ladders in the UK.
Additional, because these standards are just standards, there’s nothing to say that a ladder manufacturer actually has to meet these standards. As such, the UK market has been flooded with cheap imported telescopic ladders. I have a set that are used on our ladder user and ladder inspection courses and they never fail to horrify those on the course, and they were bought brand new from the biggest online retail store (A..zon). Buyer beware!
If you buy a brand set of ladders or steps, they will probably be certified to either EN131 or possibly BS Class 1. The Class 1 standard was replaced by EN131 back in 2018, but while EN131 has a weight rating of 150kg, Class 1 has a higher weight rating (175kg) so some manufacturers still certify their ladders to Class 1 standards.
Ladder ratings
It’s a good idea to have a rough understanding of the different ratings, or classifications, so that you understand what your ladders are capable of carrying. For home use, any certified ladder will be suitable, but for workplace use, you should really only be using EN131 Professional rated ladders & stepladders, or potentially, Class 1 ladders.
Over the years, there have been loads of different ratings, or standards, that ladders could be built to. The first of several British Standard for ladders (BS 1129) was first issued in 1945. Currently, there is one main standard that most ladders are built to; EN 131. This has several parts to it depending on the type and form of the ladder. For example, EN 131 Part 6:2019 which is the very latest standard for telescopic ladders. EN131 has been sub-divided into Professional and Non-Professional ratings. So have a look out for these standard images on the label on your ladders. If it’s not there, your ladders were made before 2018.

Fortunately, product standards are not retrospective. So you can continue to be use your ladders, provided that they meet the correct standards classification, are in good condition & inspected regularly.
Don’t forget, if you’re using ladders at work, they must be formally inspected periodically. The frequency of the inspection regime is dependant on the use of the ladder (3 months, 6 months or 12 months). You then have to keep a copy of the formal written inspection report for a minimum of 3 months. I recommend that you keep it as part of the asset record. Don’t forget to download our ladder inspection checklist – the links are at the top of the page. Here’s a link to the Health & Safety Executives document on the safe use of ladders and stepladders.
So here’s a quick run-down of the ladder standards:
Current standards:
- EN131 Professional & Non-Professional.
- EN131 Part 1 = General specification for Terms, types, functional sizes.
- EN131 Part 2 = General specification for testing and marking of ladders.
- EN131 Part 3 = General specification for marking and user instructions.
- EN131 Part 4 = Specifications for single & multi hinge-joint ladders.
- EN131 Part 5 = Accessories (pending).
- EN131 Part 6 = Telescopic ladders.
- EN131 Part 7 = Mobile ladders with platforms.
- EN131 Part 8 = Ladders with separate platform (pending).
- BS EN 14183 = General specifications for step stools.
Withdrawn standards:
- BS 1129:1990 = Specification for portable timber ladders, steps, trestles and lightweight stagings.
- BS 2037:1994 = Specification for portable aluminium ladders, steps, trestles and lightweight stagings.
- BS Class 1 = Heavy duty industrial ladders. (Replaced by EN131 Professional rating in 2018).
- BS Class 2 = Light duty & trade use ladders and step ladders. (Replaced by EN131 Professional in 1993).
- BS Class 3 = Domestic use ladders. (Replaced by EN131 Professional rating in 2018).

Finally
So there you have it; a brief guide on how to check your ladders and step ladders before you start to climb them. Don’t forget; this should be done every time you set them up to do a task. You should also check their stability & that they’re at the correct angle before you climb them. But more on that in my next blog.
Remember; if you wouldn’t climb them yourself, don’t sell them on to someone else. Sadly many people seem to think that it’s ok to sell on extension ladders that have a missing section, or step ladders that are obviously damaged.
So now you know how to check your ladders, go and check yours! See if you can find out what standard they’re built to achieve. Check them to see if there’s anything on them that needs to be cleaned off, repaired or whether they’re only fit for the skip. Don’t forget, if they’re good for the skip, you need to dispose of them properly, (cut through all the rungs) or someone will pinch them and use them. If they fall, they could then sue you because you didn’t put them definitively out of use.
Now you know what to look out for, don’t forget to download our ladder inspection checklist sheets for free – the links at the top of the blog.
If you want to get hands on training in how to inspect your ladders, please get in touch with me. Click here to read about our ladder training course (and book your place on the next course).


